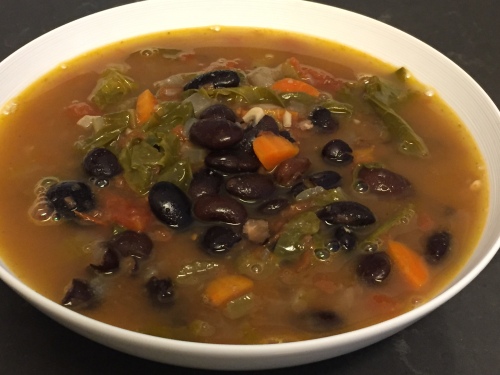
Ayocote Negro & Vegetable Soup

Thanks to Rancho Gordo I have been discovering many new kinds of beans this year. There haven’t been any I haven’t liked, but some really stand out from the crowd. The Ayocote Negro is one of those. This week, faced with rainy weather and homemade chicken stock I had in my freezer, I decided to make a soup using the Ayocote beans. And I am so glad I did! This soup is light, but hearty enough to fill you up and give you energy. The jalapeños and the cumin give it a great level of heat and flavor that complements the simple, delicious vegetables and the large toothsome beans.

IMG_4981

Ayocote Negro & Vegetable Soup

Serves 6

1 lb ayacote negro beans (or any bean of your choice)

1 bay leaf

¼ cup olive oil

1 large onion, diced

6 cloves garlic, diced

1-2 jalapeños, minced

3-4 teaspoons ground cumin

5 celery stalks, diced

2 large carrots, diced

1 28-ounce can diced tomatoes

10 cups chicken or vegetable stock

1 bunch cooking greens, chopped (red kale, lacinato, swiss chard, green cabbage, etc.)

Optional: sour cream, cilantro, diced avocado

If using dried beans, cover generously with cold water and soak overnight in a bowl. The next day, drain, rinse, and add the beans to a large pot. Cover generously with water, add the bay leaf and bring to a boil. Reduce heat and simmer for approximately one hour, or until the beans are just tender.

Drain the beans and set aside.

Rinse out your large pot and return to medium heat. When warm, add the olive and allow to warm. Add the onions, garlic, jalapeños, cumin, celery, and carrots to the pot and cook, stirring frequently for about 10-15 minutes, or until they begin to soften.

Add the tomatoes and their liquid, the beans, and the stock. Bring to boil, then reduce the heat and simmer for 50 minutes, then add the greens and continue to cook for 10 minutes or until the all vegetables are tender.

If desired, garnish with sour cream, fresh cilantro, and/or diced avocado.

spring lasagna

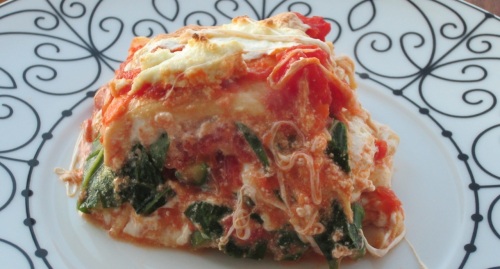
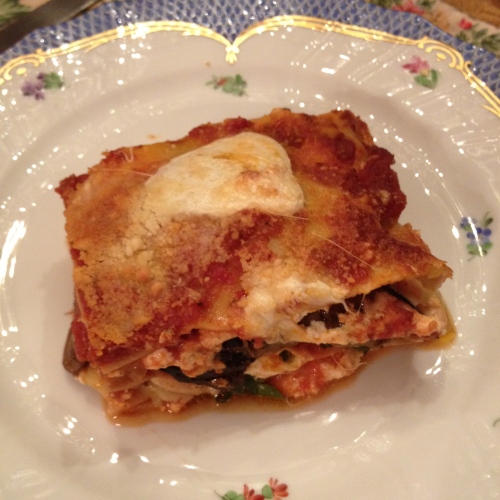
a few weeks ago i got a request for the lasagna i made over the winter, and i’m always happy to oblige. but since it’s no longer winter and spring vegetables are in abundance, i decided to offer a variation on the original. lasagna is one of those wonderful dishes that will happily accomodate whatever sauce and vegetables you decide to throw in it. some people love meat lasagnas with a cheesier and less tomato-y sauce. personally, i love my lasagna dripping with rich tomato sauce, mozzarella and ricotta cheeses, and lots of vegetables so that i can pretend it’s a healthy meal.

no matter what you decide to put into your lasagna, the method of preparation and assembly remains largely the same. and when you are done, it can be eaten immediately, the next day (the flavors really start to come together on the second day), or over a week later if stored in the freezer (be sure to cool the lasagna to room temperature before freezing). this lasagna features some of my favorite spring vegetables – asparagus*, peas, and baby spinach – but i also encourage you to try your own combinations of vegetables.

spring lasagna

serves 8

1 bunch asparagus

2 cups peas (fresh or frozen)

1/2 pound spinach, roughly chopped

2 pounds fresh mozzarella (i like to use 1 pound each salted and unsalted mozzarella), thinly sliced

2 pounds fresh ricotta

4 cups tomato sauce (i like mario batali’s basic tomato sauce with a little red wine thrown in)

2 lb fresh lasagna sheets

prep

1. make your tomato sauce (or use your favorite jar of sauce), and allow to cool to room temperature. be sure to season your sauce appropriately (salt, pepper, herbs, etc.) as this will be the main source of seasoning (besides any salted mozzarella you use).

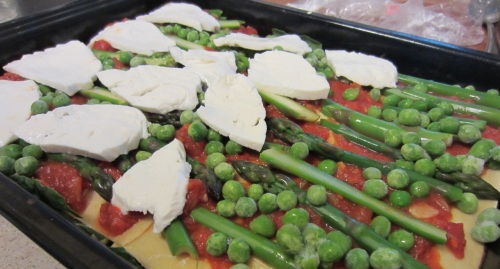
2. blanch the asparagus and fresh peas, if using, in boiling water for 1 minute. remove and plunge immediately into an ice bath, then remove and dry. cut the asparagus into 2″ pieces and set aside. (frozen peas can be added directly to the lasagna below.)

3. preheat the oven to 425.

assembly

1. spread a thin layer of sauce over the bottom of a large lasagna pan.

2. cover the bottom of the pan with pasta sheets (feel free to cut the sheets into strips to accomodate the sizes needed, but be sure to use clean scissors).

3. spread about 1/3 of your vegetables over the pasta sheets, then add about 1/4 of your mozzarella and ricotta. cover with more pasta sheets.

4. spread about 1/3 of your remaining sauce over the pasta sheets and add another 1/4 of your mozzarella and ricotta, then cover with pasta sheets.

5. repeat steps 3 and 4 until you have used all your ingredients, ending with a layer of pasta, sauce, then cheese.

6. bake in the oven for about 45 minutes, until the cheese on top is golden brown and the pasta sheets are cooked through. after removing from the oven, allow the lasagna to rest for 5-10 minutes before serving (this will help the cheese set and make serving a lot easier).

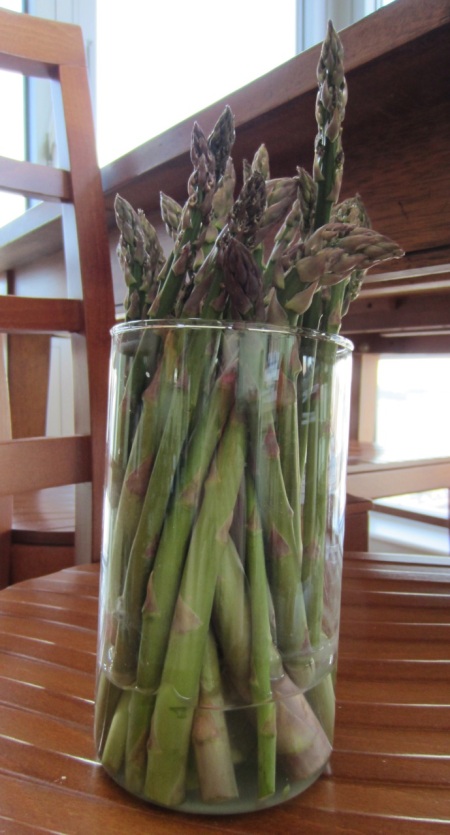
*asparagus: a few days after getting some fresh asparagus in my vegetable delivery, i read an article on www.treehugger.com about how to store fruits and vegetables. when i got home i immediately applied their advice to my (begining to wilt) asparagus. by the next morning they had perked up, and they remained crisp and vibrant until i cooked them 5 days later!

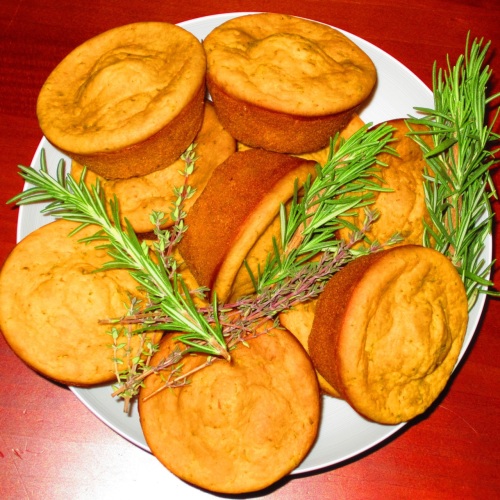
savory spring muffins

a burst of green freshness seemed just the thing to welcome the warming weather this weekend. as i considered what might do the trick, i remembered a stash of fragrant herbs i had in my fridge. herbs are easy to find, versatile, and so effective in delivering flavor. i find that a generous sprinkling makes a nice addition to almost any dish.

but so often herbs play a supporting role. why not embrace their springy goodness and make them the star? i decided to do just that with some savory muffins. i didn’t, however, have any eggs. thankfully, my tassajara bread book saved the day with its recipes for muffins with ingredients missing. i modified this technique with some herbaceous additions. the result was a fairly dense but still moist muffin that i’ve been eating for breakfast, lunch, and dinner!

savory spring muffins

makes 12 muffins

2 cups whole wheat flour

3/4 tsp salt

2 tsp baking powder

1/8 cup finely chopped thyme, rosemary, and sage, or a combination of your favorite herbs

1/4 cup olive oil

1/4 cup dark honey

1 cup milk

1. preheat the oven to 400° f.

2. in a medium bowl, combine the flour, salt, baking powder and herbs until well mixed. in another bowl, combine the oil, honey, milk, and 1 cup water. add the wet ingredients to the dry ingredients and fold until just combined. the mixture will still be slightly lumpy.

3. pour the batter evenly into greased muffin tins and bake for about 20 minutes, or until they are golden brown and a toothpick inserted into the center comes out clean.

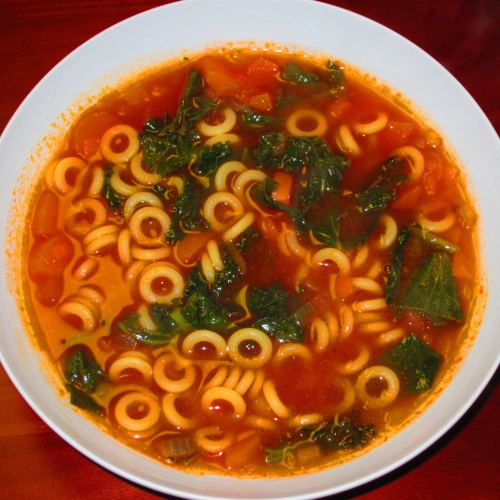
grown-up spaghetti-o soup

in spite of the relatively warm winter we’ve had in new york city, i can’t stop craving soup whenever i’m faced with crisp weather and a fridge full of spectacular vegetables. and my fridge is stocked thanks to mike’s organic delivery. it’s a connecticut-based company run by a friend who works with several regional farms. after knowing about it for a year or so, it occured to me that since i work in connecticut, i could take advantage of his delivery. now, i bring home a regular crate of flavorful and colorful fruits and vegetables. even the apples (kept in cold storage at the farms) stay fresh and delicious for weeks. apparently the secret is that by the time you eat an apple from the supermarket, it’s been chilled and warmed several times, which destroys its cellular structure. when you eat one of mike’s apples, it’s been kept at just the right temperature until you bite in. these apples are crispy, juicy, and so sweet.

however, this week’s recipe has nothing to do with apples, and everything to do with the amazing winter greens that we have been receiving as well. salad mixes, soup mixes, braising greens… my mouth waters as soon as i see them. this past week included winter russian kale, lacinato kale, collards, and sorrel, which made for an excellent soup mix. cooked together with some tomato puree, chickpeas, carrots, and anelletti (small ring-shaped pasta), they resulted in a satisfying, healthy, and easy dinner. and the anelletti, in their tomato-colored broth, gave the soup a name straight from childhood!

grown-up spaghetti-o soup

serves 4-6

1/4 cup olive oil

2 medium onions, diced

6 cloves garlic, minced

2 springs each fresh thyme and rosemary

6 medium carrots, chopped into medium rings or half-moons

3 cups tomato puree

8 cups vegetable stock

2 cups anelletti pasta

2 cans chickpeas, drained and rinsed

2 large bunches cooking greens, stemmed and roughly chopped

1. heat a large soup pot over medium-low heat. add olive oil and heat until shimmering. add the onions and cook, stirring occasionally, for 5 minutes. add the garlic and cook, stirring occasionally, until both are soft and translucent, another 6-8 minutes.
2. add the thyme, rosemary, and carrots. cook until the carrot begins to soften, about 8 minutes.
3. add the tomato puree and the stock and bring to a boil. reduce the heat and simmer until the carrots are fairly soft but not mushy, about 10 minutes.
4. while the soup is cooking, bring water to a boil in a medium pot and add the anelletti. cook according to the package directions, about 13-15 minutes, until al dente. drain and reserve.
5. add the chickpeas and the greens to the soup and simmer for another 5 minutes to blend the flavors.
6. divide the soup into bowls, add a portion of anelletti, and salt and pepper to taste.

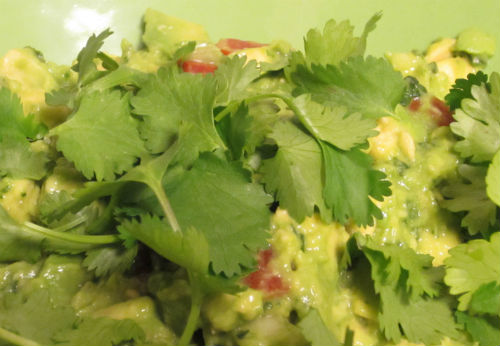
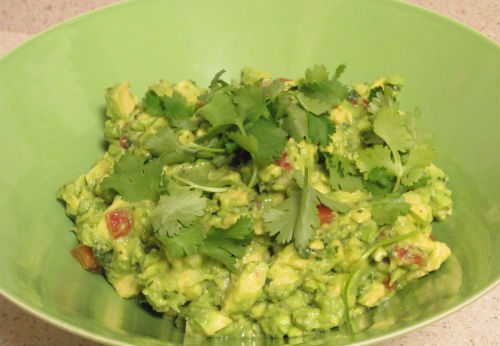
purist’s guacamole

i had to leave for a business trip yesterday, so i didn’t get to attend my own super bowl party! but my husband still had some of our friends over, and he made his amazing guacamole for the occasion. guacamole is one of those foods i can never get enough of: creamy, delicious, fresh, and healthy. it’s a perfect super bowl dish of course, but it’s also great on tacos, sandwiches, chicken, fish, and tons of other things. there’s never a bad time for a big batch.

my husband’s recipe is nothing fancy, which is really the point. with guacamole, minimalism is the way to go. that doesn’t mean that fusion variations, say with mango or smoky seasoning, aren’t worth trying. but if you want the pure flavor and luscious texture of avocados at their best, keep it simple and read below!

a note on avocados: avocados can be tricky to buy. they never seem to ripen when you need them, and they often have tons of brown spots when cut open. i find it best to buy avocados several days before i need them. when ripe, they give slightly to gentle pressure. they should not be totally soft. if your avocados seem on track to ripen before you can use them, put them in the fridge. if they’re still rock-hard and you’re making guacamole soon, put them in a closed paper bag for a couple days.

purist’s guacamole

serves 4-6 as a snack or side

1/2 large bunch of cilantro, stemmed and roughly chopped, plus a few sprigs for garnish

1 large jalapeño, seeded if you wish (more seeds=spicier guacamole) and very finely minced

1/2 teaspoon kosher salt

4 avocados, prepared per instructions below

juice of 1 large lime

2 medium tomatoes, seeded and cut into medium dice

1/4 small onion (or more if you wish), minced

1. in a molcajete or mortar and pestle, or with the side of a large knife, mash together the cilantro, jalapeño, and salt until they liquify. work in batches if necessary. place the mixture in a large bowl.

2. prepare each avocado one by one. open by sliding a knife around the long way, then twisting apart the two halves. drive the blade of the knife into the pit and twist it out of the avocado. toss one or two of the pits into the guacamole bowl as you work; it helps prevent the guacamole from browning. discard the other pits. remove each avocado half with a large spoon, then place the halves flat-side down and chop into small squares. place each chopped avocado in the bowl and sprinkle immediately with some of the lime juice, again to prevent browning.

3. once all the avocados are in, add the tomato and onion and stir gently to combine the entire mixture. do not overmix! the flavors will mingle and improve if you have a few hours, or even a day, before you eat. just keep the guacamole in an airtight container, and in the fridge if it’s sitting for more than a little while. taste for seasoning just before serving and add more lime juice or salt if needed. transfer to a serving bowl, garnish with cilantro sprigs, and dive in!

super bowl muffins

i’m a dessert devotee. even if i’m stuffed from the main course, i always have a second stomach for sweets. why should a super bowl party be any different? since my husband and i are planning to host a few friends for the game next week, i started thinking this weekend about some tasty items for the buffet. everyone has their savory favorites–buffalo wings, nachos, overstuffed sandwiches, and the like. but for me, the first priority is dessert!

i wanted to make something delicious and unfussy. most super bowl parties are not white-tie affairs, after all. i also had a yearning for a note of freshness to combat the winter doldrums. the answer: plump muffins with blueberries, raspberries, and white chocolate chips. by using frozen berries, you avoid fruit grown far away that’s a week old by the time it reaches your supermarket, and you prevent the berries from becoming mushy messes (thanks to baking illustrated for this tip, and for the recipe on which i based my muffins). the white chocolate chips make little pockets of gooey sweetness interspersed with the tart and vibrant fruit. and as a bonus, the muffins’ colors work for both the giants and the patriots, so you can serve them proudly no matter what team you and your friends are supporting!

super bowl muffins

makes 32 mini muffins or 12 regular muffins

2 cups all-purpose flour

1 tablespoon baking powder

1/2 teaspoon salt

1 large egg

1 cup sugar

4 tablespoons unsalted butter, melted and cooled slightly

1 1/4 cups sour cream (low-fat or regular)

3/4 cup frozen blueberries

3/4 cup frozen raspberries

1/2 cup white chocolate chips

1. preheat the oven to 350° f. grease the muffin pan.

2. in a medium bowl, whisk together the flour, baking powder, and salt and set aside. in a second medium bowl, beat the egg until light and fluffy. add the sugar and whisk until thick and well-combined. add the melted butter slowly, whisking constantly to combine. then add the sour cream and whisk until just combined.

3. add the frozen berries to the dry ingredients and toss to coat. add the white chocolate chips, then add the wet ingredients and fold until the berries and chocolate chips are evenly distributed and the batter is just combined.

4. spoon the batter into the muffin pans. bake for about 30 minutes, rotating the pan in the oven halfway through. when done, the muffins will be light golden-brown and a toothpick inserted into the center of a muffin will come out clean. allow the muffins to cool slightly before removing from the pan.

winter white bean soup

what is healthy, delicious, and a great way to clean out your pantry and fridge? soup! with my inability to leave whole foods for under $100, and my husband’s and my penchant for exploring different grains and legumes, we often end up with an assortment of these unused in our apartment. and with limited space it’s important to use up what you have before going out for more! so on a cold and snowy weekend, nothing beats the chill and uses ingredients at hand like soup. i will admit we had to pick up some diced tomatoes and kale, but you have to get out for some fresh air anyway, so it was a good excuse for a walk.

this soup was inspired by some of our favorite italian soups, with a base of mirepoix, white beans, and tomatoes. the spirit of this soup is that after that you can add any vegetables you have or love. we added lacinato kale, my favorite vegetable at the moment, but any greens such as broccoli, cabbage, or string beans would be delicious. we also substituted shallots for some of the onion because we had some languishing from an october farmer’s market outing. and definitely don’t skimp on the carrots, because the sweetness they provide ties together the flavor beautifully.

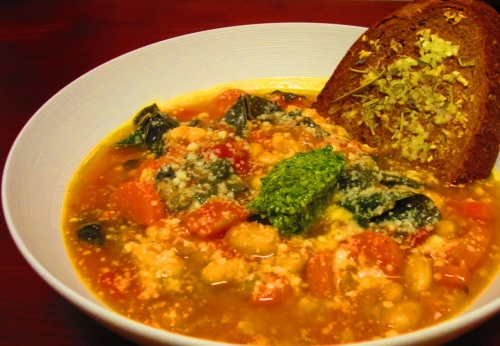
and because this soup is so versatile, the adaptations and garnishes don’t stop with the ingredients. in its natural state it will be a delicious broth-based dish, but if you use an immersion blender or a food processor to puree a portion of the cooked ingredients, you will create a hearty and richly textured mixture full of vegetarian goodness. you can also top off your soup with a spoonful of pesto. here’s a recipe for the basil pesto i eat all summer long, but in winter you can forgo the expensive basil in grocery stores and use arugula, or your other favorite spicy green. and last but not least, a slice of crusty bread toasted with olive oil, garlic, herbes de provence, and salt goes perfectly alongside — or right in — your bowl.

winter white bean soup

serves 6-8

1 1/3 cups dried beans, such as cannellini

3 sprigs thyme

2 bay leaves

1/4 cup olive oil

1 large onion, finely diced

5 medium carrots, cut into 1/8″ rounds

5 stalks celery, cut into 1/8″ pieces

8-10 cloves of garlic, thinly sliced

3 sprigs thyme, 2 sprigs rosemary, and 2 sprigs oregano, all tied together with twine

2 tsp or 2 cubes vegetable bouillon (or chicken if you prefer)

1/2 cup white wine

1 28-oz can diced tomatoes

salt and pepper to taste

1 bunch lacinato kale or other cooking green, stemmed and cut into 1/2″ ribbons

1. at least 8 hours before cooking, place the beans in a bowl with water to cover by 1″. cover with plastic wrap and let stand at room temperature.

2. drain the beans and rinse thoroughly. place the beans in a medium pot along with fresh water to cover by at least 1″.  add 1 of the bay leaves and the three sprigs of thyme. bring to a boil over high heat, then reduce the heat and simmer, covered, until the beans are fairly tender but still al dente, about 30-45 minutes depending on the type of bean.

3. meanwhile, heat the olive oil in a large soup pot over medium heat. add the onions and cook, stirring infrequently, until soft and transparent, about 10 minutes. add the carrots, celery, and garlic and cook, stirring regularly, until the vegetables begin to soften, about 5 minutes more.

4. when the beans are ready, drain through a strainer set over a bowl, reserving the cooking liquid. set the beans aside.

5. once the vegetables have begun to soften, add the bouillon and stir to dissolve. add the remaining bay leaf and the bundle of herbs. then add the white wine, tomatoes with their juices, beans, 1 cup of the reserved bean cooking liquid, and 5 cups of water. salt and pepper generously and stir to combine all ingredients.

6. bring to a boil, then reduce the heat and simmer, partially covered, for about 12-15 minutes, until the beans and carrots are soft but not mushy. add the kale and simmer another 5 minutes to combine the flavors.

7. serve garnished with pesto, parmesan cheese, and extra-garlicky toast.

mirepoix: a french term for a combination of diced onions, carrots, and celery used as a flavor base for many soups, stews, stocks, and sauces.

a mincemeat pie to beat the cold

this weekend was cold, and felt especially so compared to the mild winter we’ve had so far. since i had already had my fill of christmas cookies and stollen, i started thinking about other winter treats i hadn’t eaten in a while. i decided to try a treat that was a staple of medieval winter cuisine and has stood the test of time: mincemeat pie. traceable back to the 13th century, when european crusaders were influenced by middle eastern cuisine that often combined sweet and savory ingredients, mincemeat pies traditionally contained meat, fruits, and spices. in slightly more modern times it proved a useful winter staple as the filling could be prepared in advance and sealed in jars for use during the cold months when most foods were in short supply. although meat has been weaned from the recipe in the last several centuries, it remains a rich and complex pie that i loved as a child.

having now baked one myself, i can tell you it is just as delicious as i remembered, and i think it will become a winter tradition in my kitchen. although the ingredients require 3 hours of cooking, the actually preparation of the whole pie is very simple. it’s the perfect thing to bake on a day when it’s too cold to go outside. once you have prepared the ingredients, you can leave them simmering on the stove while you attend to neglected to-do lists or watch a good movie, only stopping by occasionally to stir your filling. by the end of the day you will be warm and fulfilled with this sweet and spiced pie that i guarantee will keep the frost at bay.

the recipe i decided to use is from the baking companion to the ever-reliable best recipe cookbook, baking illustrated. i just know that when i try one of their recipes for the first time it’s going to be a success. that said, i did make a few changes of my own, which i have noted in italics in the recipe.
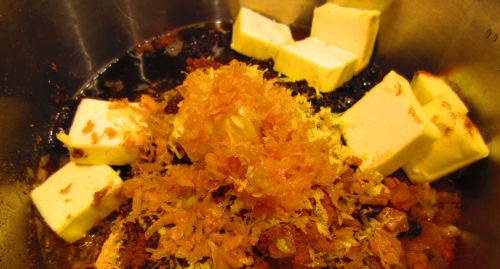
the ingredients, ready to go

modern mincemeat pie

serves 10-12

filling

6 large apples, a combination of crisp, tart, sweet, and soft varieties, peeled, cored, and cut into 1/4-inch dice

1 cup golden raisins

1 cup currants

1/2 cup sliced almonds, toasted

grated zest and juice from 1 orange

grated zest and juice from 1 lemon

1/4 cup diced candied orange peel

3/4 cup packed dark brown sugar

1 teaspoon ground cinnamon

1/2 teaspoon ground allspice

1/2 teaspoon ground ginger

1/4 teaspoon ground cloves

1/4 teaspoon salt

8 tablespoons (1 stick) butter

1 1/2 cups apple cider, plus more as needed

1/3 cup rum or brandy

dough

2 1/2 cups flour (i use half spelt and half wheat flour)

1 teaspoon salt

2 tablespoons sugar

1/2 teaspoon ground cinnamon

1/4 teaspoon ground allspice

1/4 teaspoon ground ginger

1/8 teaspoon ground cloves

8 tablespoons (1/2 cup) vegetable shortening, chilled and cut into small pieces

12 tablespoons (1 1/2 sticks) butter, chilled and cut into small pieces

6-8 tablespoons ice water

1 beaten egg for glazing the pie dough

1 tablespoon demerara sugar (or any sugar you have on hand) for garnishing the crust

1. preheat the oven to 400°f.

2. place all the filling ingredients except 1/2 cup of the cider and the rum in a large, heavy saucepan set over medium-low heat. bring to a boil and reduce heat to simmer gently. stir occasionally to prevent burning, until the mixture thickens and darkens in color, about 3 hours, adding more cider if necessary to prevent burning. at this point, the filling should have a jam-like consistency. then stir in the remaining 1/2 cup apple cider and the rum and cook until the liquid is thick and syrupy, about 10 minutes. cool the mixture to room temperature or refrigerate up to several days.
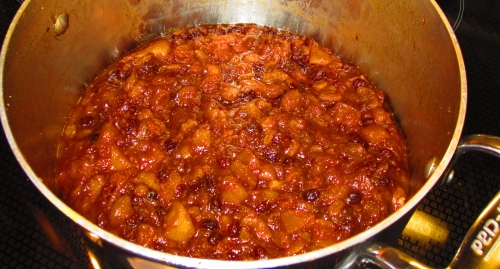
mincemeat filling, after 3 hours of simmering

3. while the mincemeat is cooking, prepare the dough. place the flour, spices, salt, and sugar in a food processor and pulse until well combined. sprinkle in the vegetable shortening, and pulse for about 10 1-second pulses. sprinkle in the butter and pulse for another 10 1-second pulses, or until the mixture resembles course sand with pieces of butter no larger than a pea. turn the mixture out into a metal bowl and sprinkle with 6 tablespoons of ice water. using a spatula, fold and press the dough together, gradually adding more ice water if needed to make the dough cohere. divide the dough into 2 discs, wrap in plastic wrap, and refrigerate for 1 hour or up to 2 days.

3. when the mincemeat is cooled and the dough is chilled, roll out the first of the discs of dough, on a well-floured surface, to a 12-inch circle. transfer the dough to a 9-inch pie plate. then roll out the second piece of dough to a 12-inch circle. spoon the mincemeat into the pie shell. place the second piece of dough over the filling. trim the edges of the top and bottom dough layers to 1/2 inch beyond the lip of the pan. tuck the rim of dough under itself so that the folded edge is flush with the pan lip. flute the edges or press with fork tines to seal. cut a few slits into the top of the dough (any design you like; this is just to let excess steam escape). brush the top crust with the beaten egg and sprinkle with the sugar.
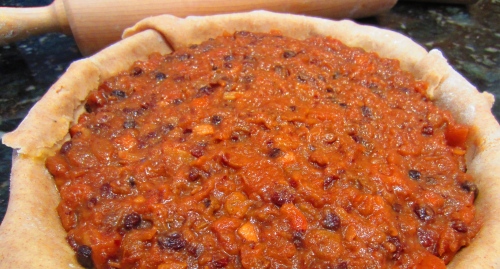
4. bake the pie on the middle rack until the crust is light golden brown, 25 minutes. rotate the pie and reduce the oven temperature to 350°f. continue to bake until the juices bubble and the crust is deep golden brown, about 45 minutes. the bottom crust should also be golden (easy to see if you use a glass pie dish).

5. transfer the pie to a wire rack and cool to room temperature before serving. garnish with whipped cream.

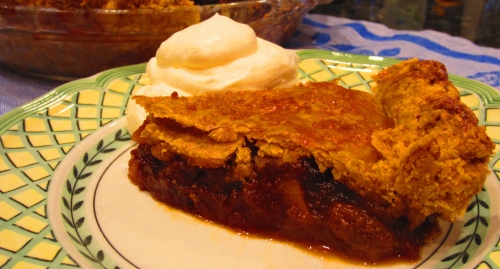
starting the new year right

the last few weeks of december were a whirlwind of cooking and eating, and i enjoyed every minute! one of my sisters and i started baking the thursday before christmas, and the result was double batches of gingerbread and cardamom rolled cookies, kourabiedes, and walnut wimpy balls. we also made 6 marzipan stollens, which have become a family favorite thanks to the ny times, and a batch of homemade eggnog. the time spent with her and my parents as we baked, decorated, and ate was the best vacation i could ask for. most of the best times with my family happen in the kitchen, and this holiday was no different.

but, you can’t consume sugar 24/7 without craving something savory. so my husband made a trip to little italy on christmas eve and came back with the most delicious fresh lasagna sheets from piemonte ravioli and fresh ricotta from da alleva. and in the meantime i roasted some sliced eggplant and zucchini, sauteed some mixed mushrooms, and cooked up a batch of our favorite mario batali marinara.  we then assembled 3 lasagnas, because when you have double batches of all your desserts, you can’t skimp on the main course!

after a few more days of eating and hanging out, my husband and i headed to naples, fl to visit his parents. in contrast to the cold spells we experienced on previous visits, we had nothing but sun and warmth this time around. my days on the beach were only interrupted by the search for delicious seafood, which we found at kelly’s fish house, riverwalk cafe, and truluck’s. we also managed to track down some delicious local oranges and grapefruits, which are now in peak season.

but by the time we got home on new year’s eve, both my husband and i felt like our bodies were ready for a change of pace. luckily i had made a surprise reservation for new year’s day at pure food and wine here in new york city. pure food and wine is a raw and vegan restaurant, so it was definitely a departure from our usual dining experiences. some of the dishes require that you ignore previous conceptions of standard items such as tacos or polenta, but i found everything i tasted to be incredibly refreshing and full of flavor. when you are cooking with only raw fruits, vegetables, and nuts it is important that the products are of very high quality. the difference came through on every dish, and unfortunately the prices as well.

then, on wednesday, we took our new year’s health kick to a the next level with a 3-day juice cleanse from blueprint cleanse. with the goal of relieving any residual holiday stress on our digestive organs, we consumed juiced greens, apples, beets, carrots, ginger, lemon, pineapple, mint, and cashews for 3 days. having done this before, and struggled through the last day, i was happy that this time felt much easier. my body felt light and healthy starting on the second day and i was sad to come to the end yesterday. that said, it is my goal this year to eat more vegetables and to eat lighter in general, so hopefully the healthy feeling will continue.

happy new year to all my readers! i look forward to blogging with you in 2012.

walnut wimpy balls

growing up, december was a magical month filled with preparation and anticipation for christmas. once the tree was decorated, the house was decked out in pine boughs and christmas lights, and the carols were playing on the radio, we could turn our attention to the food. more specifically, the cookies. standard on the list were decorated gingerbread and sugar cookies, gingersnaps, kourabiedes, and walnut wimpy balls. but while these are all delicious, wimpy balls hold a special place in our hearts.

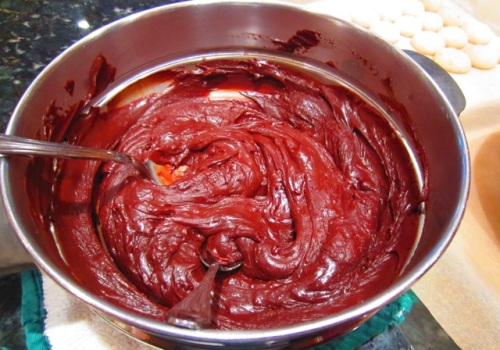
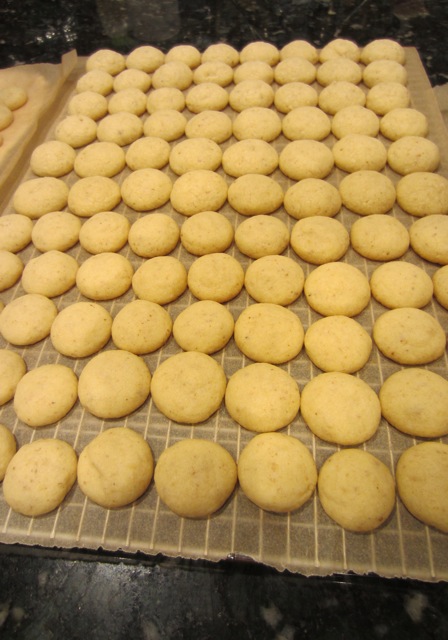
these cookies, inspired by a recipe found in yankee magazine years ago, and tinkered with for years after that, will melt in your mouth. the icing, straight from my great-grandmother’s kitchen, is a burst of deep, thick chocolate. when smooshed together, these sandwiches will have you hooked at the first bite. just don’t forget to handle the cookies gently while you are assembling the finished product. they can crumble if pressed too hard, and then you’ll have to eat the ones you break!

walnut wimpy balls

(makes 50 bite-sized cookies)

cookies

2 cups whole walnuts

2/3 cup confectioner’s sugar

1 cup (2 sticks) butter, at room temperature

1 teaspoon vanilla extract

1 3/4 cups flour

chocolate icing

5 ounces bittersweet chocolate

1 can sweetened condensed milk

2 teaspoons vanilla extract

1. preheat oven to 350°f.

2. in a food processor, grind walnuts with 2 tbsp of confectioner’s sugar until finely ground. set aside.

3. in an electric mixer, cream butter and remaining sugar until pale and fluffy. beat in the vanilla. then add flour and 3/4 cup of the ground walnuts and mix well.

4. roll balls of dough, about the diameter of a nickel, and bake on cookie sheets covered with non-greased parchment paper at 350°F for 10-12 minutes, until just barely golden. cool on a rack.

5. while the cookies are baking and cooling, prepare the chocolate icing. first add all ingredients together in the top of a double boiler set over simmering water. then stir until chocolate is melted and all ingredients are fully combined. set aside.

6. when the cookies are cool, sandwich the flat sides together using 1/2 teaspoon chocolate icing. roll the sides in the remaining ground walnuts.

what’s your favorite holiday cookie? and do you want some new ideas?…

What’s Gaby Cooking: Peppermint Bark Chocolate Cookies

And Love It Too: Snowball Cookies (Grain-Free, Dairy-Free and Vegan)

Taste With The Eyes: Olive Oil Oatmeal Cookies

Jones Is Hungry: A Cookie for Chocolate Lovers

From My Corner of Saratoga: Gooey Butter Cookies

The Sensitive Epicure: Speculaas Dutch Windmill Cookies

Napa Farmhouse 1885: Salted Chocolate & Dulce de Leche Fudge

Virtually Homemade: Chocolate Mint Snowballs

Sweet Life Bake: Polvorones de Chocolate

Daily*Dishin: Cherry Topped Cream-Drop Cookies

FN Dish: Peanut Butter-Chocolate Chip-Bacon Cookies

Thursday Night Dinner: Peppermint Bark Cookies

Dishin and Dishes: Pecan Sandie Thumbprints With Cherry Frosting

Mooshu Jenne: Biscotti

Cooking With Elise: Sweet and Salty White Chocolate Cranberry Oat Cookies