Category Archives: Cookbooks

savory spring muffins

a burst of green freshness seemed just the thing to welcome the warming weather this weekend. as i considered what might do the trick, i remembered a stash of fragrant herbs i had in my fridge. herbs are easy to find, versatile, and so effective in delivering flavor. i find that a generous sprinkling makes a nice addition to almost any dish.

but so often herbs play a supporting role. why not embrace their springy goodness and make them the star? i decided to do just that with some savory muffins. i didn’t, however, have any eggs. thankfully, my tassajara bread book saved the day with its recipes for muffins with ingredients missing. i modified this technique with some herbaceous additions. the result was a fairly dense but still moist muffin that i’ve been eating for breakfast, lunch, and dinner!

savory spring muffins

makes 12 muffins

2 cups whole wheat flour

3/4 tsp salt

2 tsp baking powder

1/8 cup finely chopped thyme, rosemary, and sage, or a combination of your favorite herbs

1/4 cup olive oil

1/4 cup dark honey

1 cup milk

1. preheat the oven to 400° f.

2. in a medium bowl, combine the flour, salt, baking powder and herbs until well mixed. in another bowl, combine the oil, honey, milk, and 1 cup water. add the wet ingredients to the dry ingredients and fold until just combined. the mixture will still be slightly lumpy.

3. pour the batter evenly into greased muffin tins and bake for about 20 minutes, or until they are golden brown and a toothpick inserted into the center comes out clean.

a mincemeat pie to beat the cold

this weekend was cold, and felt especially so compared to the mild winter we’ve had so far. since i had already had my fill of christmas cookies and stollen, i started thinking about other winter treats i hadn’t eaten in a while. i decided to try a treat that was a staple of medieval winter cuisine and has stood the test of time: mincemeat pie. traceable back to the 13th century, when european crusaders were influenced by middle eastern cuisine that often combined sweet and savory ingredients, mincemeat pies traditionally contained meat, fruits, and spices. in slightly more modern times it proved a useful winter staple as the filling could be prepared in advance and sealed in jars for use during the cold months when most foods were in short supply. although meat has been weaned from the recipe in the last several centuries, it remains a rich and complex pie that i loved as a child.

having now baked one myself, i can tell you it is just as delicious as i remembered, and i think it will become a winter tradition in my kitchen. although the ingredients require 3 hours of cooking, the actually preparation of the whole pie is very simple. it’s the perfect thing to bake on a day when it’s too cold to go outside. once you have prepared the ingredients, you can leave them simmering on the stove while you attend to neglected to-do lists or watch a good movie, only stopping by occasionally to stir your filling. by the end of the day you will be warm and fulfilled with this sweet and spiced pie that i guarantee will keep the frost at bay.

the recipe i decided to use is from the baking companion to the ever-reliable best recipe cookbook, baking illustrated. i just know that when i try one of their recipes for the first time it’s going to be a success. that said, i did make a few changes of my own, which i have noted in italics in the recipe.

the ingredients, ready to go

modern mincemeat pie

serves 10-12

filling

6 large apples, a combination of crisp, tart, sweet, and soft varieties, peeled, cored, and cut into 1/4-inch dice

1 cup golden raisins

1 cup currants

1/2 cup sliced almonds, toasted

grated zest and juice from 1 orange

grated zest and juice from 1 lemon

1/4 cup diced candied orange peel

3/4 cup packed dark brown sugar

1 teaspoon ground cinnamon

1/2 teaspoon ground allspice

1/2 teaspoon ground ginger

1/4 teaspoon ground cloves

1/4 teaspoon salt

8 tablespoons (1 stick) butter

1 1/2 cups apple cider, plus more as needed

1/3 cup rum or brandy

dough

2 1/2 cups flour (i use half spelt and half wheat flour)

1 teaspoon salt

2 tablespoons sugar

1/2 teaspoon ground cinnamon

1/4 teaspoon ground allspice

1/4 teaspoon ground ginger

1/8 teaspoon ground cloves

8 tablespoons (1/2 cup) vegetable shortening, chilled and cut into small pieces

12 tablespoons (1 1/2 sticks) butter, chilled and cut into small pieces

6-8 tablespoons ice water

1 beaten egg for glazing the pie dough

1 tablespoon demerara sugar (or any sugar you have on hand) for garnishing the crust

1. preheat the oven to 400°f.

2. place all the filling ingredients except 1/2 cup of the cider and the rum in a large, heavy saucepan set over medium-low heat. bring to a boil and reduce heat to simmer gently. stir occasionally to prevent burning, until the mixture thickens and darkens in color, about 3 hours, adding more cider if necessary to prevent burning. at this point, the filling should have a jam-like consistency. then stir in the remaining 1/2 cup apple cider and the rum and cook until the liquid is thick and syrupy, about 10 minutes. cool the mixture to room temperature or refrigerate up to several days.
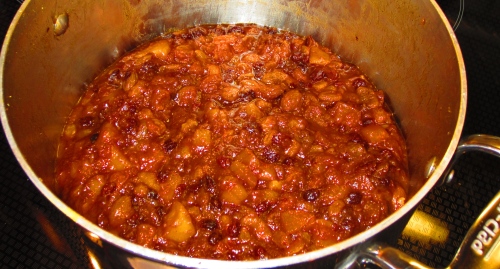
mincemeat filling, after 3 hours of simmering

3. while the mincemeat is cooking, prepare the dough. place the flour, spices, salt, and sugar in a food processor and pulse until well combined. sprinkle in the vegetable shortening, and pulse for about 10 1-second pulses. sprinkle in the butter and pulse for another 10 1-second pulses, or until the mixture resembles course sand with pieces of butter no larger than a pea. turn the mixture out into a metal bowl and sprinkle with 6 tablespoons of ice water. using a spatula, fold and press the dough together, gradually adding more ice water if needed to make the dough cohere. divide the dough into 2 discs, wrap in plastic wrap, and refrigerate for 1 hour or up to 2 days.

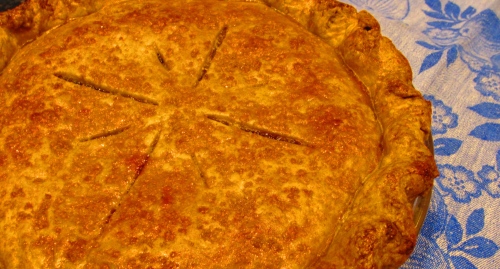
3. when the mincemeat is cooled and the dough is chilled, roll out the first of the discs of dough, on a well-floured surface, to a 12-inch circle. transfer the dough to a 9-inch pie plate. then roll out the second piece of dough to a 12-inch circle. spoon the mincemeat into the pie shell. place the second piece of dough over the filling. trim the edges of the top and bottom dough layers to 1/2 inch beyond the lip of the pan. tuck the rim of dough under itself so that the folded edge is flush with the pan lip. flute the edges or press with fork tines to seal. cut a few slits into the top of the dough (any design you like; this is just to let excess steam escape). brush the top crust with the beaten egg and sprinkle with the sugar.

4. bake the pie on the middle rack until the crust is light golden brown, 25 minutes. rotate the pie and reduce the oven temperature to 350°f. continue to bake until the juices bubble and the crust is deep golden brown, about 45 minutes. the bottom crust should also be golden (easy to see if you use a glass pie dish).

5. transfer the pie to a wire rack and cool to room temperature before serving. garnish with whipped cream.
a ride on the marrakech express

in 2006 i had the pleasure of visiting morocco with my family. it was one of the most exciting and exotic trips i’ve ever taken, filled with an incredible range of sights, sounds, and smells. we visited one of the world’s largest mosques in casablanca, the intense and exhilarating souks of fez and marrakech, and a beautiful guest house in the atlas mountains, where you can find fresh, cool air only an hour from the desert-like landscape below.

of course the food was a highlight of the trip. delicious vegetable salads, citrus juices, flaky pies filled with poultry and eggs, and an endless range of tagines — the savory stews stuffed with meats, veggies, dried fruits, spices, or any and all of the above. we ate all of these dishes and more for a week, often accompanied by some impressive belly dancing. but no trip to morocco would be complete without towering plates of couscous, the delicate grains enhanced by veggies, meats, legumes, and a rich and savory broth.

with summer turning quickly into fall here in the u.s., i decided that a moroccan-inspired couscous would be the perfect way to use summer’s vibrant harvest in a warm and satisfying way. in vermont during the first half of the labor day weekend, i picked up some beautiful zucchini, a bright red pepper, and a handful of soft and sugary plum tomatoes. back in new york, i flipped through some of my kitchen standbys and found a recipe in the joy of cooking for couscous with zucchini and cherry tomatoes. it calls for quick-cooking couscous, which comes out fluffy and hearty with an absolute minimum of effort. with this as a base, i tossed in some homemade veggie stock i had saved and a can of chickpeas from the pantry. i also swirled in some spices along the lines of ras el hanout, the standard and spectacular moroccan mix. the result was a comforting and healthy dish that will put you in the mood for a ride on the marrakech express!

vegetable and chickpea couscous with moroccan spices

serves 4-6

3 tbsp olive oil

1 medium onion, cut into small dice

3 cloves garlic, minced

3 cups vegetable stock (or stock of your choice), warmed

3 small zucchini, cut into 1/2-inch thick half-moons

1 red/orange/yellow pepper, seeded and cut into 1/2-inch squares

2 tsp dried herbes de provence

1 1/2 cups quick-cooking couscous (i prefer whole grain)

1 can chickpeas, drained and rinsed

3 large plum tomatoes, seeded and cut into 1/2-inch squares

salt and pepper

for ras el hanout

1 1/2 tsp ground ginger

1/2 tsp each: ground black pepper, ground allspice, ground nutmeg, ground cardamom, ground cinnamon, ground turmeric, ground coriander, ground cloves, and ground red pepper flakes (if you don’t have all the spices, just add whatever you have!)

1. for the ras el hanout, mix all ingredients in a small bowl.

2. heat 2 tbsp of the olive oil in a large dutch oven or pot over medium heat. saute the onions, stirring occasionally, until lightly golden, 6-8 minutes. add garlic and cook, stirring, another 2 minutes.

3. add the warm stock, stir in the ras el hanout, then add the zucchini. bring to a brisk simmer and cook, partially covered, for 3 minutes. add the peppers and simmer for another 4 minutes. do not let the vegetables get fully tender.

4. turn off the heat. stir in the couscous, chickpeas, herbes de provence, and 1 tbsp olive oil. mix all ingredients well in the pot. cover and let stand 8-10 minutes, until the stock is absorbed (or a bit sooner if you like a brothier dish). everything will be perfectly tender.

5. stir in the tomatoes and serve immediately, with a drizzle of olive oil if you like. add salt and pepper to taste.

mexican monday

“m” is for monday, as well as for mad men, which i finally started watching last night, and for the delicious mexican food my husband and i cooked with the help of rick bayless’s cookbook authentic mexican. we are both huge fans of mexican food, especially tacos, and we had a nice free-range chicken from old athens farm tucked away in our freezer that we had defrosted earlier in the week.

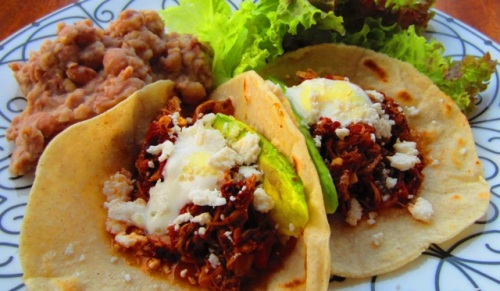
we’ve only had this cookbook for about a year, so we haven’t made it through many of the recipes, but our favorite so far is the chicken tinga, traditionally made with pork. tinga is shredded chicken, or pork, in a spicy, smoky stew of onions, garlic, tomatoes, chipotles in adobo, and chorizo. it can be eaten straight out of a bowl or, with some of the liquid left behind, used for tacos. all the recipes in authentic mexican are easy to follow and the steps and ingredients are explained in detail, which is very helpful for those us of who didn’t grow up cooking mexican food.

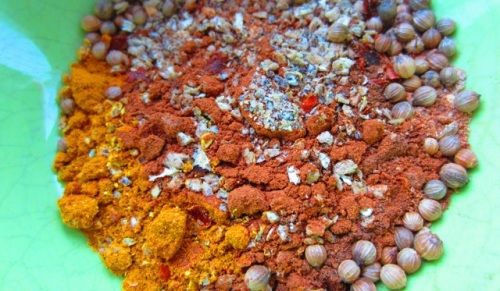
this time around we decided to try an experiment with the chorizo the recipe calls for. chorizo has an incredible depth of flavor that is crucial to the taste of tinga, but we find turkey a little healthier than pork. so we made our own turkey chorizo, and it couldn’t have been easier or more rewarding! using ground dark turkey meat we added all the spices and vinegar recommended in bayless’s recipe for pork chorizo. then we let it sit for about 30 minutes in the fridge. because the sausage gets crumbled and browned in the tinga recipe, it’s not even necessary to mess with sausage casing, which can be a handful. the resulting sausage was leaner than a typically greasy chorizo, and the flavor was every bit as intense and satisfying as usual. the only adjustment required was the use of a bit more olive oil when browning the chorizo. if you don’t have the energy or the time to make your own chorizo, there are plenty of options for store-bought sausages. just look for one that contains as few preservatives as possible and you will be on your way to a delicious tinga!

the other key to tinga’s bold flavor is chipotle peppers in adobo sauce. you can find small cans of these peppers in mexican grocery stores or even many regular supermarkets. since chipotles are smoked jalapeños, they add an unmistakable smokiness to the stew. and even though we seed ours before plopping them in, they also add quite a bit of heat. the adobo sauce contributes a kick of vinegar and spices. you can of course adjust the amount of chipotles in adobo according to your preference, but a tinga can’t be a tinga without them!

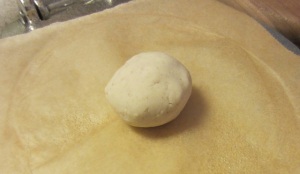
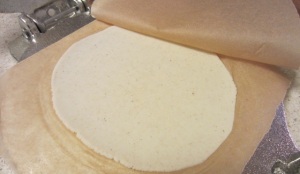
the allure of mexican food is not just the main dish, but all the wonderful accessories that these dishes call for. and i would venture to say that tacos are in the top 5 list of my husband’s favorite foods. so a few birthdays ago i bought him a tortilla press at win restaurant supplies in astoria, queens. i happened to be in the area, but chances are there is a kitchen supply store near you wherever you live. and it’s not much of an exaggeration to say that this $15 gift has been one of the most successful presents i’ve given him in the nine years we’ve known each other. it is simple to use, and there is nothing that beats a freshly cooked tortilla to wrap your chicken tinga — or pretty much anything else! cooking the tortillas involves two dry frying pans at different heats and we think it’s easiest as a two-person assembly line, but so long as you follow bayless’s directions carefully, you’ll be a tortilla pro in no time. we never fail to turn out a warm, satisfying stack.

portioned tortilla dough

ready for pressing

headed for the frying pan

to balance out the heat of the tinga, we added a side of refried beans to our meal. my mom has been making these for my family for decades, and her recipe is so easy and delicious that i stick to that one, even with a mexican cookbook in hand. so here’s her straightforward method for making a successful plate of refried beans.

mom’s refried beans

serves 4 as a side dish

1 1/2 cup dried pinto beans

1 large onion

1 bay leaf

1/4 cup olive oil

1 cup chicken or vegetable stock

salt and pepper

1. rinse the beans several time, checking for any irregular beans or stray stones. put in a bowl and cover with water. cover with plastic wrap and let stand in a cool area overnight or for at least 8 hours. strain and rinse again several times.

2. place beans, 1/2 of the onion chopped into 2 pieces, and the bay leaf in a medium pot and cover with fresh water. bring to a boil, then reduce to a simmer and cook until beans are fully cooked, about 40 minutes. when done, remove the large pieces of onion and the bay leaves and set the beans aside.

3. dice the remaining 1/2 onion. heat 1/8 cup olive oil in a large frying pan over medium-low heat. add onions and cook, stirring occasionally, until they are soft and translucent, about 10 minutes. add the beans and cook over medium heat, adding stock and/or remaining olive oil to maintain moisture. use a large spoon or potato masher to partially crush most of the beans. fry until beans are cooked to your taste, about 30 minutes. then salt and pepper to taste.

tinga? check. tortillas? check. refried beans? check. all that remains is to let your inner mexican taste buds go crazy. i’m not a big fan of rules when it comes to toppings, so go for whatever you like! last night we had slices of avocado, crumbled cotija cheese, sour cream, and caviar limes (which i recently read about and couldn’t resist ordering). we’ve also been known to top our tacos with crema fresca (made from sour cream, lime juice, and hot sauce), queso fresco, guacamole, cilantro, and fresh squeezed limes. i suggest any and all of these for a highly enjoyable meal packed with sabor!